Table of Contents
Fixing a leaky bathtub faucet isn’t as intimidating as it may sound. At its heart, it simply involves replacing washers and turning some valves until everything is securely fastened and watertight. In just easy steps, I will break down how you can fix your own bathtub faucets quickly and painlessly for good.
Owning a home is such an adventure! It can be full of surprises, and sometimes those surprises come in the form of bathroom problems like leaky faucets. You don’t want watermarks on the ceiling or frequent mold growth that keeps you up at night – it’s important to take care of this issue quickly!
Getting your hands dirty may not sound appealing, but with some tools (like a wrench, crescent pliers, and screwdriver set) and materials (think: plumber’s putty), coupled with patience & planning, you’ll have this problem fixed before too long. Ready for DIY glory? Let’s do it!
What Causes a Leaky Bathtub Faucet
A leaky bathtub faucet is caused by water flowing through the pipes and valves not being properly sealed, allowing water to seep out. It could also be caused by corrosion buildup or mineral deposits on the valve stem, preventing the water main to it from completely closing off.
A leaky bathtub faucet can be annoying, especially if it keeps you up all night long! While it may seem nerve-wracking to fix the leaks, it’s not too difficult. The problem is most likely in a faulty gasket or worn rubber washer.
Importance of Fixing a Leaky Bathtub Faucet
It’s bad enough that a leaking bathtub faucet can be annoying, but the long-term consequences of ignoring a problem like this can be pretty costly. That pesky drip is essentially money slipping down the drain, as the never-ending leak can cause your water bill to skyrocket over time.
If left unchecked, a dripping bathtub faucet every three seconds can waste up to 700 gallons of water annually. Put an end to this wasteful habit and fix that leak! Not to mention, a damp area near your faucet could lead to mold or other inconvenient issues. So if you have a leaky tub faucet, it’s best not to ignore it!
Following the simple steps explained in this post will save you from noisy distractions and steep water charges.
Overview of the Steps involved
To begin, gather your tools: adjustable pliers to loosen the nuts, flat-head and Phillips head screwdrivers, and a paper towel. Then turn off your water supply valve, remove the faucet handle to access the valve stem, and pull it out.
If the seal is still in good condition, you can simply put it back in place; if not, you’ll need to replace it with a new one. Once your new seal is inserted into the valve and stem assembly, return everything else to its original position before turning on the water. With a few easy steps and some patience, you can have your leaky bathtub faucet running smoothly again soon!
Tools and materials required
To help you through the process, make sure you stock up on all the right tools and materials beforehand. You’ll need a few simple items, such as a flathead screwdriver, adjustable wrench, seat wrench, flashlight, channel-lock pliers, and gasket sealant.
Don’t forget also to have a good supply of materials like replacement rubber flat faucet washers, O-rings that are made for your specific faucet type, penetrating oil or silicone grease, towel, and faucet seats (2). With these pieces in place, your leaky bathtub faucet will be fixed quickly – it’s just like putting together a puzzle!
Preparation
Before you can begin your plumbing work, it is necessary to do a bit of preparation. First and foremost, be sure that the water has been shut off. To turn off the tap in your tub, search for the shut-off valve nearby the wall close to the heater or the meter – one each for hot water and cold water – then switch them both clockwise until they are securely turned off.
Turn on the faucet to release any water left, and then shut the drain afterward. If your faucet has any decorative covers or rings that need to be removed before accessing the nuts, take them gently off the fixture.
Spread a towel on the floor of the tub to cover the small spaces before you remove the faucet screws to prevent the screws from falling and getting lost.
Of course, give yourself plenty of room while you work – better not leave any shaggy rug fibers around where they might slip in between parts! Now you’re ready for the fun part – time to stop that leak!
How to Fix a Leaky Bathtub Faucet – Easy Steps
So you’ve identified your faucet type and disassembled everything; now it’s time to inspect those components for damage. Don’t be too surprised if you find something that looks like it needs replacement – faulty parts are pretty common when it comes to leaky bathtub faucets.
Don’t worry though; take a deep breath, head out to buy the suitable replacements, and soon enough, you’ll have everything up and running again. While you’re at it, why not get some extra components, too, so you can easily handle any future repair jobs?
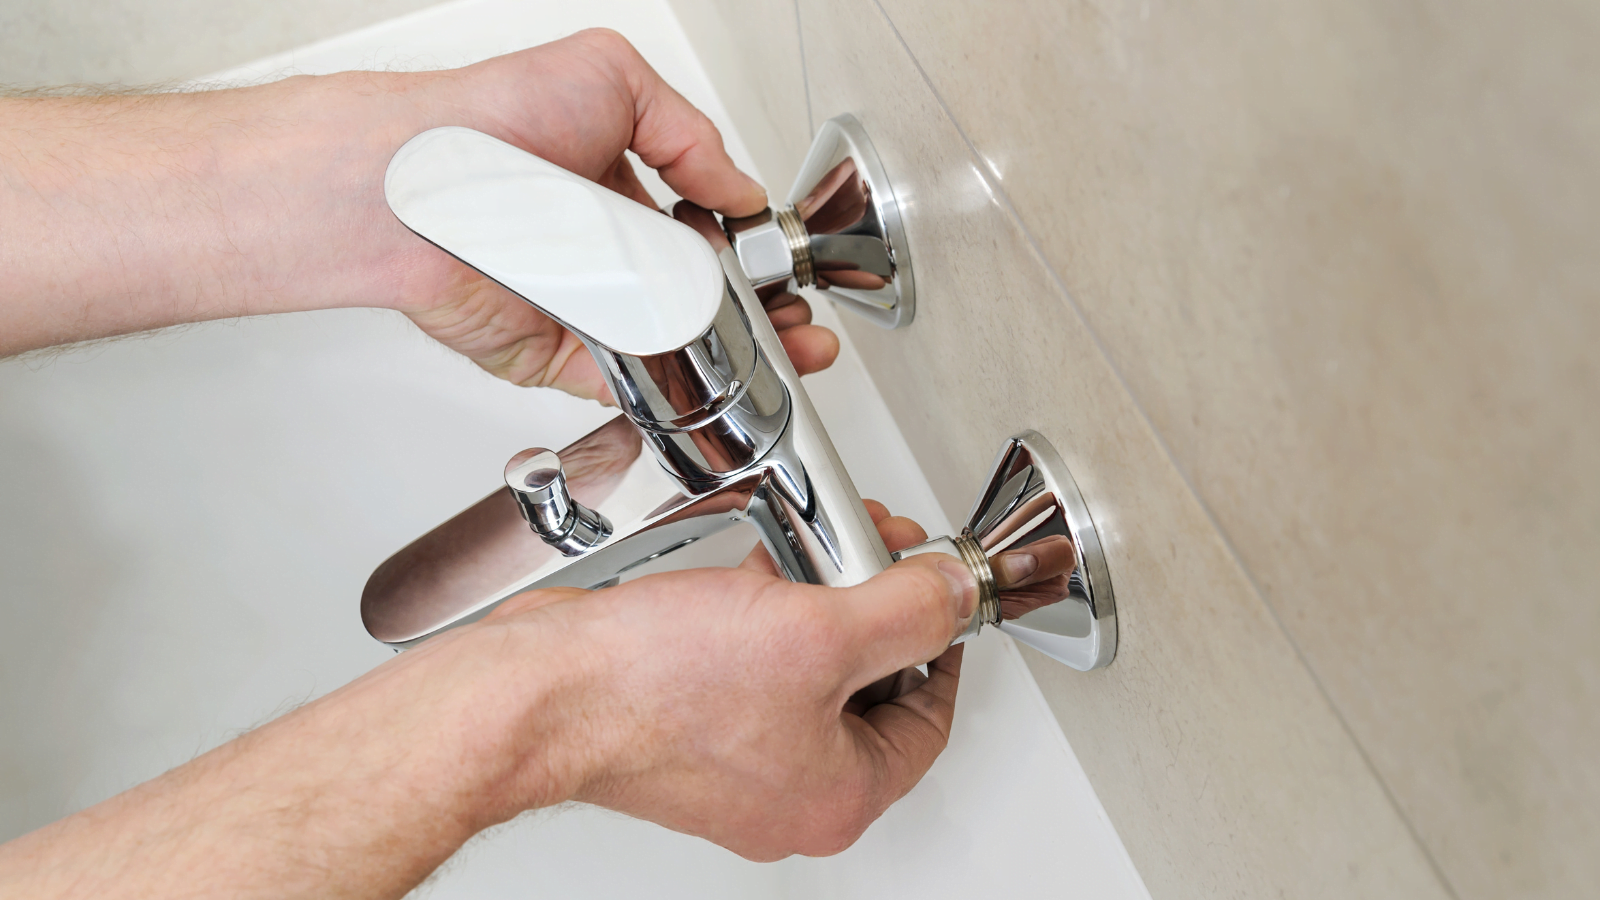
Remove the Faucet Handle
The faucet handle is usually held in place by a screw. Locate the screw on the handle and use the Philips Head screwdriver to remove it. Once the faucet screw is removed, pull the handle off the faucet.
Take off the Escutcheon
To successfully remove an escutcheon (metal or plastic used to add a decorative cover to the pipe holes), you may either pull it out straight or unscrew it. Before the task can be completed, however, any set screw present with a Phillip’s head must first be taken care of- fortunately, this is easy and will guarantee that your job gets finished correctly!
Take Out the Stem
To adjust the water flow, use pliers or an adjustable wrench to loosen the brass nut that holds your faucet’s stem in place. After you’ve loosened it sufficiently, pull out the stem and remove any rubber washers behind the stem with a Phillips head screwdriver.
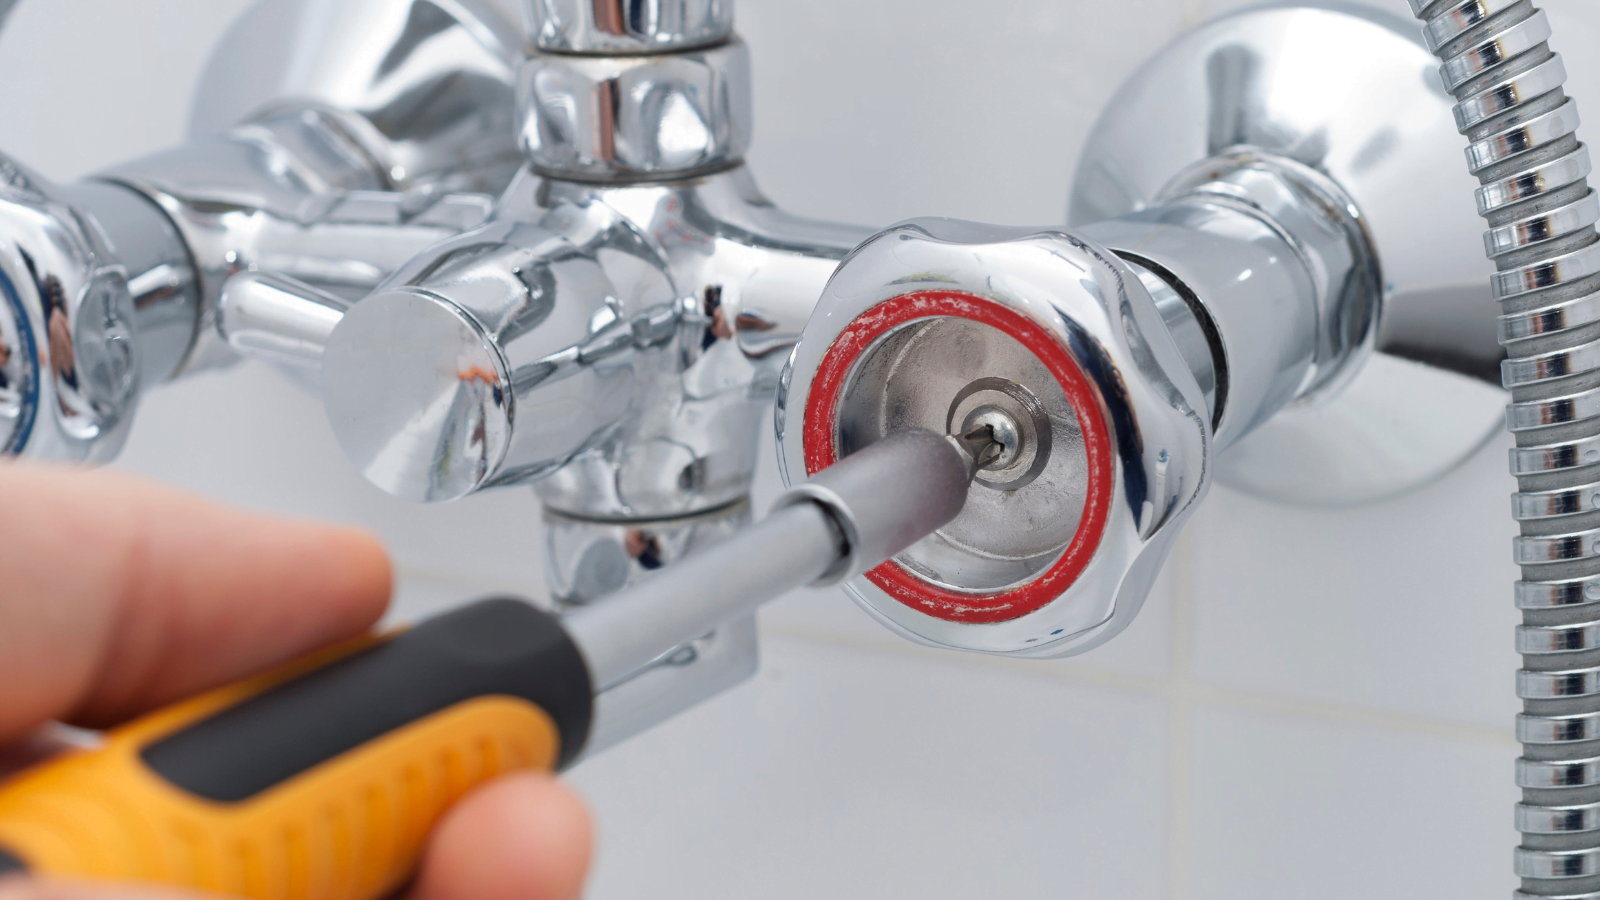
Inspect the Faucet Components
Carefully inspect the faucet for any wear and tear, considering the O-ring, washer, and valve seat. If evidence of damage is found on any part of these components, be sure to switch out or replace that piece right away.
Replace Damaged Components
If the O-ring is damaged, use pliers to remove it and replace it with a new one. If the washer is damaged, remove the screw holding it in place and replace it with a new washer. If the valve seat is damaged, use a valve seat wrench to remove it and replace it with a new one.
Reassemble the Faucet
Reassemble the faucet components in reverse order. Securely place the faucet stem back into its socket and firmly tighten the nut that holds it together. Afterward, carefully affix your faucet handle back onto its position and ensure to securely fastened with a screw for extra protection.
Testing the Faucet
Turn the water supply back on and test the faucet by checking for any leakage signs. Be sure the water flows smoothly. Take note of how it feels to make sure the pressure seems right. When you’re done, turn off the faucet if all is good — congratulations! You have successfully fixed your leaky bathtub faucet!
This video by Home Depot also provides a straightforward, step-by-step approach to fix your leaky bathtub faucet quickly and effectively.
This Home Depot video provides a straightforward, step-by-step approach to repairing your leaky bathtub quickly and effectively.
Frequently Asked Questions on How to Fix a Leaky Bathtub Faucet
How Much Does It Cost To Fix a Leaking Bathtub Faucet?
If your bathtub faucet requires repair or replacement, you’re looking at an average cost of $350, with a range typically between $300 and $450. However, depending on the complexity involved in either replacing it entirely or repairing it simply, that figure could vary significantly – from as much as one thousand dollars to just fifty!
Can You Fix a Leaky Faucet Yourself?
Even the most inexperienced DIYer can quickly and affordably fix a leaky faucet. The most common causes of leaky faucets, such as worn-out washers or gaskets, loose O rings, and corroded valve seats, can be easily identified and repaired with an accessible faucet repair kit.
Can You Put Tape Over a Leaky Bathtub Faucet?
Yes, protect your faucet’s decorative surfaces from wrench scratches by wrapping them in a few layers of flex or masking tape. If there is a packing nut present in the leaking faucet, cover it with tape before gently tightening it.
Can a Handyman Fix a Leaky Faucet?
If you need help with a pesky faucet that just won’t stop dripping and are unable to fix it yourself, call a handyman right away! They can provide you with the expertise necessary for repairing your tap quickly and efficiently. Don’t let that drip get in the way of life – have an expert take care of it before it gets any worse!
Why Does Bath Faucet Leak When Shower is On?
The leaky tub faucet is diverting pressure away from your showerhead. While this happens in most households, it is still a problem you should fix. This is typically caused by one of two issues: the buildup of hard water deposits or a failed shower head diverter valve.
Bottomline
Think that fixing a leaky bathtub faucet is beyond your capability? Well, not anymore! You can easily remodel your bathroom with the right tools and supplies and save some cash. But before getting rebuild-happy with rubber gloves on – be sure to take all necessary safety precautions as well as have patience throughout the process.
You should be able to fix a leaky bathtub faucet by now with minimal effort using the steps explained above; you’ll have this job done in a jiffy and without the hassle of unnecessary strain. Feel great about taking matters into your own hands! Ready to get started? Let’s take on that tub together now…


Thanks for this.